To provide new life to any room, wall painting can surely be your first step but success will be possible only if the wall preparation is done properly. This comprehensive guide will help customers to follow the core of the processes that are required to paint walls and get a look that is suitable for a UK home: a good repaint that will not be secretly admired by others.
1. Gather Necessary Materials
Make sure there are all the tools and materials present before you start. These consist of:
- Coverlets for the floor or plastic sheets
- Masking tape
- Spackle and putty knife
- Sandpaper (from the roughest to the finest)
- Household accessories (sponge, bucket, mild detergent)
- Primer
- Paint rollers and brushes
- Screwdriver (for the removal of fixtures)
Nevis Paints Company will suggest the range of quality supplies for exterior and interior paint, which can help a lot to make this DIY project instead of a professional painter.
2. Clear and Protect the Room
The wall preparation process begins with the removal of furniture and the decorations of your room. If you have any items that can be moved, cover them with drop cloths or plastic sheets. Do not forget the floor, protect it as well. The walls must be free of any screws or nails, curtains, shades, light switch covers have to come down.
3. Clean the Walls Thoroughly
Clean and rub walls are the essential elements for the paint coating, otherwise the adhesive will not work well. A mixture of warm water with a little mild detergent is used to clean the walls. Take care of the walls in all rooms, especially if dust and dirt are collected in the corners and the baseboards. For spots that are too hard, a specific wall cleaner might be needed. After cleaning, rinse the wall with clean water and allow it to dry completely.
4. Repair Any Damage
It’s best to look at the wall and if you see some cracks, holes, dents, fill them with spackles. The spackle should be applied with a putty knife. Maybe the bigger holes could be fixed with a patch kit. Once the spackle joints are dry, sand them until they are even with the remaining wall area.
5. Sand the Walls
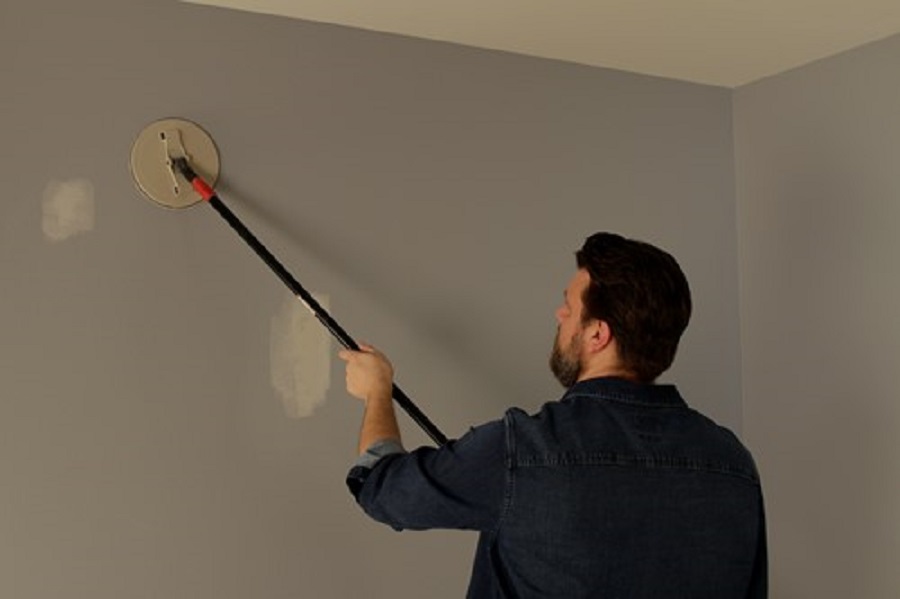
Utilise sandpaper to make the whole surface a little rougher so as to give the adhesion of the primer and paint the best chance. Start with a medium-grit sandpaper and finish with a fine-grit paper for the walls to become smooth. Be sure to use a damp cloth to remove the excess dust after sanding.
6. Apply Painter’s Tape
Use painter’s tape to shield the areas you do not want to be painted, such as trim, windows, and doorframes. Apply the tape firmly in order to prevent paint from leaking underneath.
7. Prime the Walls
Primer is the most significant step before doing your paint job, especially if you choose to paint over dark shades or fresh drywall. Applying prime is the way to bond the paint well with the wall and enhance the covering capacity of paint. Nevis Paints supplies different types of primer paints which are designed for different surfaces and specific painting projects.
8. Allow Proper Drying Time
Drying is a major thing after you have done some job with the wall such as cleaning, mending, and priming. The consistency in drying time will prevent any interference of moisture with the paint and help to ensure the perfect outcome.
Common Mistakes to Avoid
When you are in the process of preparing walls for painting, avoid this:
- Not cleaning the surfaces using the cleaning agent before painting the walls
- Passing by the repairing of bad walls in a hurry
- Forgoing the sanding of the surfaces in between spackle applications
- Leaving outlet covers in their place before paint application
- Using a primer or paint on a wet wall
Tips for Different Wall Types
Various wall surfaces may require special treatment. Here you go:
Drywall
First, you need to add some primer-sealer to the new drywall before you can start putting the paint on it. For the existing drywall, please take the necessary steps to repair damaged parts and obtain a smooth finish.
Plaster
Older plaster walls might have some hairline cracks. Utilise a flexible filler designed by plaster to repair those areas before you paint.
Textured Walls
When you are preparing Dealing with the textured walls, you should not worry about the smoothness of the surfaces. The reason is that you are preventing the texture from being damaged. Likewise, don’t forget to make use of a thick-nap roller for overloading which displays coverage consistency for painting.
Dealing with Mould and Damp
Rendering on the topic of the UK’s climate, asides the issue of mould and damp being common, my view of the cases is different. If the mould appears, you must deal with the fundamental problem, that is the fact that the place is damp before doing anything else. Use a mould-proof product and make sure the area is absolutely dry. In case of persistent dampness, it is essential to take advice from a qualified professional before moving on with painting.
Eco-Friendly Options
Nevis Paints targets environment-friendly housing by offering a wide range of VOC-hybrid markers and low-VOC (Volatile Organic Compounds) primers and paints. These products are more suitable as they have less harmful effects on the environment, and the indoor air quality also gets better.
When to Call a Professional
Practice self-help where possible but in cases like the ones below, let the experts do the job for you:
- First-time LBP handling in the older houses
- Problems with damp or mould that have expanded considerably
- Repair of a wall or replastering
- When there are very high ceilings or very difficult-to-reach rocky zones
Once again, following these steps is the sole sure way to launch a successful painting project. The unmatched quality of Nevis Paints inspires us to deliver work beyond professional standards. Homeowners will achieve stunning results that enhance their home’s elegance for years. As you may know, doing something fewer times often yields better results.


