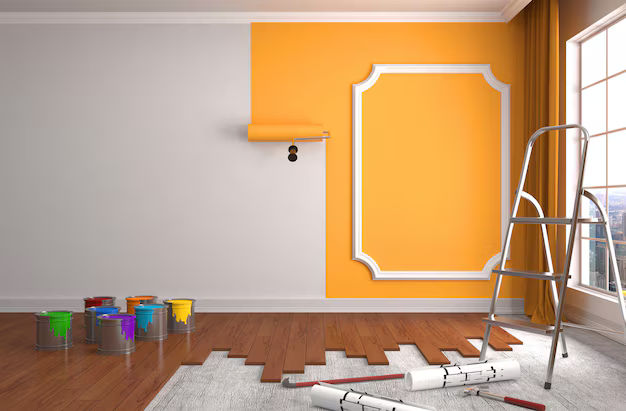
One of the most cost-effective ways of changing the look is to update the interiors and walls using a new coat of paint. Apart from bringing a change in how the home looks and feels, painting the walls and ceilings allows for more customization of the house. It is exactly possible to end up with a professional quality outcome as long as the right approaches and preparations are done. So in case you are worried about where to start while painting walls and ceilings in a house in the UK, we have got you covered in this blog.
Do Your Preparations
In order to get a smooth end surface, getting the right preparation work done is very important even before you start assembling the required items. Here are some tips to prepare:
1. Clean the Room And Avoid Mess at All Costs
Start by taking out all the furniture pieces that are touching the floor. In case there are some pieces that are unable to be removed, it would be logical to cover them up using drop-cloths. Use painter’s tape in order to mask off baseboards, doors, and windows as well as any part of the surface that requires no painting. Also, use proper covers for the floors and carpets in order to avoid permanent staining and accidental spills.
2. Assess and Restore the Skin
Examine any cracks, holes, or irregularities on your wall and ceilings. Use a good quality filler to fix those problems and then smoothen the surface by sanding it. In due course, removing dust, as well as grease from the surfaces, calls for a requirement of washing the walls by either using a damp cloth or a detergent which would help in ensuring the paint to be applied properly.
3. Collect the Resources Required for the Task
Hoping for exceptional outcomes in the results you obtain, thorough analysis of the working tools you would need will be crucial. Here’s what you’ll need:
Quality rollers and brushes
- Paint trays with a liner
- Pole for a paint roller
- Tape for painters
- Step ladder
- Primer and Paint
What Color Should I Paint My House?
Paint is considered as one of the most crucial aspects for ensuring remarkable results for your project. There are certain specifications such as:
1. Paint Finish Types Available
- Matte Finish: Designed for effective cover-up of wall flaws and also produces seamless and contemporary effects.
- Satin Finish: The wall surface created using satin finish is moderately sheened and is applicable in regions of lesser foot traffic.
- Gloss Finish: For larger trims and mouldings, gloss offers a very shiny and excellent revolving paint.
2. Color Selection Guidelines
- Cooler Colors: Cool colors such as blue, purple, and green – ache, timeless colors, great for working towards creating a more peaceful environment.
- Lighter Tones: Warmer colors enable feeling of more space and airiness in relatively smaller rooms.
- Bold Colours: The most daring and modern touch can be applied to feature walls or large areas.
Decorating is crucial, painted walls are made easy with Nevis Paints, as it provides a variety of colours and finishes to fit what you are looking for.
Step By Step Instructions on Painting Walls and Ceilings:
To easily paint any wall or ceiling like a pro, these are the pointers to follow:
1. Apply Primer First:
Priming is the best way to enhance the performance of your paint and smoothen its appearance. Whenever necessary, choose the appropriate primer for the surface to be painted and the paint to be used for that primer.
2. Edge the Walls:
With an angled brush, gently dab paint around the corners of the walls, ceiling and walls. This method is called ‘cutting in’ where clean lines are made around tight areas where paint rolls cannot adequately be accessed
3. Do the Ceiling First:
Ceilings should always be painted first to prevent any paint drips from running onto freshly painted walls. Get a good quality roller which comes with an extension pole, and section off a small area at a time. Working over each area for a few strokes will ensure an even spread. For the finish of ceilings, flat would work best as this would reduce any form of glare.
4. Paint the Walls
Once the ceiling dries up, the walls are next in line. Use a roller to paint the walls in the ‘W’ or the ‘M’ picture before using horizontal movements to fill in the spaces. Ensure that you do not cover your roller too much so that the paint does not drip or streak.
5. Apply Additional Coats
To get the coat of paint that looks professional, most of the tasks need at least two coats. Don’t forget to make sure that the previous coat is fully dried before applying a new coat. A coat that is made up of thin layers paints better and lasts longer as it gives good coverage and is strong.
Pro Tips for a Flawless Finish
These are the tactics that professional painters use in order to make their work perfect:
1. Work with a Wet Edge
This will help avoid lap marks maintaining a wet edge by painting it where the previous coat has dried. However, ensure that you are quick to caution the area from drying till paint is applied in all areas.
2. Don’t Skimp on Drying Time
Rushing leads to smudges and an uneven texture, hence it is important to have a good amount of patience while waiting between coats so that they dry completely.
3. Remove Tape Before the Paint Dries
To get neat edges and to ensure nothing gets peeled off, take off the painters tape when the coat is already wet.
4. Assess and Touch Up
After the final coat has cured, assess the aspect under the appropriate light source. Use a smaller brush to fix missed areas or defects.
Cleaning Up
Tidying up and cleaning the tools assists make certain that they are in good condition for use next time as well as makes sure that the working area is orderly:
- Wash Paint Brushes and Rollers: Clean paint using warm soapy water for latex paints or oil thinners for oil based paints.
- Dispose Off Remaining Paints and Materials Correctly: Aid the local council in disposing of paints and materials by respecting their rules.
- Seal Unused Paint: Place back unopened tin of paint into usable paints for precautions.
How To Care For Newly Painted Surfaces
These tips can help maintain the appearance of your freshly painted walls / ceilings for a longer period:
- Keep It Clean: Dust off and wipe the walls gently with a wet cloth to clean off the dirt.
- Repair Damage Quickly: Fix chips and scratches as soon as practical to preserve the finish.
- Repaint When Required: Areas that are consistent in traffic may need repainting every couple of years to keep up the bright look.
What To Consider When Doing Painting By Yourself
There’s much to gain when doing the work and painting by yourself than hiring or contracting a professional such as:
- Reduction in Expense: Pay less money as labor cost, incurred when hiring professionals, is not there.
- Artistic License: Design the area as fully desired.
- Building a very strong sense of achievement: There is nothing as gratifying as physically changing the environment in which you live.
DIY Faith, Trust Nevis Paints
With Nevis Paints, all professional standards evaluations of paintwork will be met. We have an exquisite assortment of brushes, and a comprehensive choice of paint textures and colors, so you can be sure that we will help you realize your dream. You can now also check out our products at our online shops or order them from our company, wherever you are.
In the case where it’s your first experience, approach painting the walls and ceilings like a true craftsman by knowing the correct tools, adequate preparation, and important skills to employ. With the help of this guide, you are able to achieve superior levels of craftsmanship and scouring that will facilitate your home improvement. Whether you’re making a small room overhaul or a remodeling of your entire house or apartment, do not forget that you put in your time and that time will turn out to be well spent towards the uniqueness of the space.
Consulting Nevis Paints professionals for all DIY painting related endeavors will be a perfect decision. A good place to start your next phase with assurance of your imagination coming true.


