Giving your old wooden furniture and metal fixtures a fresh splash of paint can revive your home’s vibe—think of it as a mini makeover for your cherished pieces. Whether you’re restoring that vintage chair, refreshing your cabinet handles, or turning metal railings into statement pieces, following these simple steps will set you up for a professional-looking finish that’s both durable and seriously pro. Here’s a handy step-by-step guide to get you started.
.
1. Gather Your Materials
Before you roll up your sleeves, gather up these must-haves:
- Sandpaper (both medium and fine grit)
- Primer that works for wood or metal
- High-quality paint (latex, oil-based, chalk, or spray paint)
- Paintbrushes, rollers, or spray applicators
- Painter’s tape and drop cloths
- Cleaning supplies (mild detergent, degreaser, or rubbing alcohol)
- Protective gear (gloves, mask, and safety glasses)
- Clear topcoat or sealer for extra durability
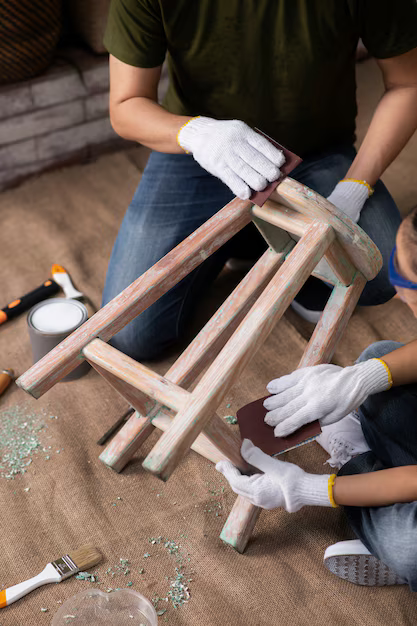
2. Prepare the Surface
Getting the surface ready is crucial for a flawless and long-lasting finish.
- For Wooden Furniture: Start by sanding off old paint, varnish, or any bumps in the road—then wipe away the dust with a damp cloth and let it dry fully. Think of it as prepping a canvas for a masterpiece.
- For Metal Fixtures: Grab a wire brush or sandpaper to knock off rust, dirt, and flaky bits. Give the surface a good clean with a degreaser or rubbing alcohol—this step is key to making sure your new paint sticks around.
3. Apply a Suitable Primer
Primer is your best friend here—it not only helps your paint bond like a charm but also boosts the longevity of your finish.
- For Wood: Opt for a stain-blocking or adhesion-promoting wood primer.
- For Metal: Go for a rust-resistant metal primer to keep corrosion at bay.
Make sure to let the primer dry completely before moving on.
4. Select the Right Paint & Application Method
Choosing the right paint is where the magic begins—it’s all about matching the finish to your vision.
- For Wood: Acrylic, chalk, or oil-based paints are great choices depending on the finish you want.
- For Metal: Use spray paint, enamel, or specialized metal paint for a smooth, even coat.
- Application Tips: Use a brush for those detailed nooks, a roller for broad, flat areas, and spray paint when you need a fast, even coat on metal pieces.
5. Apply Paint in Thin, Even Layers
When it comes to painting, layering is your secret weapon—multiple thin coats beat one thick, messy layer any day. This approach helps dodge drips and keeps the finish looking flawless. Let each coat dry completely before you move on, and a light sanding between layers can work wonders for an ultra-smooth finish.
6. Protect with a Clear Topcoat
Seal the deal with a clear topcoat—it’s the perfect way to boost durability and give your work some extra armour against everyday wear and tear. For wood, go for polyurethane, wax, or lacquer depending on the look you crave. For metal, a rust-resistant sealer is your go-to to keep things looking sharp for longer.
7. Allow Proper Drying & Curing Time
Patience is key—let your paint cure fully (typically 24 to 48 hours, but always check the label) before you start reassembling or using your revamped pieces. Also, keep heavy stuff off your freshly painted surfaces until everything has completely hardened—trust us, your masterpiece will thank you.
Final Thoughts
Revamping your wooden furniture and metal fixtures is an awesome, budget-friendly way to give your space a whole new lease on life. With a bit of solid prep, the right tools, and a careful hand, you’ll achieve a finish that looks straight out of a pro’s portfolio. And remember, Nevis Paint has your back with a range of top-notch paints and primers crafted for both wood and metal—making it easy for UK homeowners to dive into any project with confidence.